During the height of a holiday travel season, rapid lab tests that screen airline passengers for the Covid virus, catch inebriated drivers on the highways, or verify the identity of travelers passing through security checkpoints are more important than ever.
We take a look at each of these technologies to see how they work behind the scenes.

Air Travel is Difficult Right Now. Covid Tests make it Possible.
As frustrating as domestic and international air travel is during this holiday season, many flight routes would probably come to a complete standstill if it were not for rapid Covid tests.
Yet, there remains a lot of confusion about how these tests work internally.
For example, what is the difference between a rapid antigen test and a PCR test? Which one is more accurate, and why?
To answer these questions, let’s look at the underlying laboratory science.

The Science behind the Rapid Antigen Test (AKA Lateral Flow Test)
The Covid rapid antigen test (known as the lateral flow test in other parts of the world) offers convenience and speed. And it’s simple enough to administer at home. However, for reasons we’ll see shortly, it’s not quite as accurate as a PCR test.
To use the rapid antigen test, you swab your nasal cavity with a long sterile swab then insert the swab into a tube filled with a buffer solution, mixing it (under the provided instructions) to transfer the nasal sample into the liquid. Next, the liquid sample is carefully dripped into a concave well on the plastic test cassette reader.
If you were to open up the plastic cassette, you’d reveal a long rectangular test strip with extra layers at the end furthest away from the sample well.
The idea is that the liquid sample will flow laterally from the well to the far end of the strip (hence the term “lateral flow,” which is commonly used to refer to this test outside the USA).
Conceptually, the use of a test strip is similar to chromatography in that the liquid sample spreads out along the test strip. But, unlike chromatography, the user does not have to interpret gradations of color.
Instead, the rapid antigen test strips have been coated during the manufacturing process with two narrow, sharply delineated lines of reactive chemicals – one labeled “T” (for Test) and the other labeled “C” (for Control, not Covid!).
(NOTE: If you’ve ever used a home pregnancy test, the rapid antigen test kit cassette may seem very familiar, as it also uses a similar lateral flow test strip, albeit one calibrated to test for the presence of hormones indicating pregnancy.)
So how does this work for testing Covid?
In a successful test, the liquid from the well is absorbed into the test strip and flows into the direction of the thick padding at the far end.
As the liquid sample moves away from the well, it will first make contact with the “T” line, which is coated with reagents that will detect and bind with any antigens that your body’s immune system has produced in response to an active Covid infection.
If Covid antigens are present, these reagents bind with the antigens and change color, creating a dark visible line (at the “T” for Test label) which indicates a positive Covid test.
So what is the “C” line for? This is the Control line; it’s there to validate if the test strip is working. The C line is coated with a different set of reagents that will create a dark line in the presence of non-Covid related nasal sample compounds. Every test taken needs to produce a solid “C” line on the test strip; otherwise, something has gone wrong with the test, such as liquid sample sizes that were too small to flow across the strip, reagents that have gone bad, or some other anomaly. Tests that do not produce a solid line at the C label should be discarded and another test conducted.
As we mentioned at the outset, this rapid antigen test is quick (the whole process can be completed in about 15 minutes); it can be done at home, and it will soon be free (the Biden administration has announced it will be distributing 500 million tests at no cost to the user); however, in some instances, a rapid antigen test can lead to false-negatives, which are a big problem – you might have a Covid virus infection, but the test thinks you don’t, perhaps because you have not yet produced enough antigens to the virus for the test to detect. Another new concern with rapid antigen tests is whether they can identify the lasted Covid variant, Omicron, or not.
Rapid antigens can also produce false positives, so most people use rapid antigen tests as a screening tool, confirming their results with a more accurate (but more time-consuming) PCR test conducted in a laboratory.
Let’s look at the PCR test process next.
PCR Tests are More Accurate but Take Time to Process
The Polymerase Chain Reaction (PCR) test, which can identify a particular section of DNA within a sample, has become a mainstay of laboratory science since it was first developed by biochemist Kary Mullis. (Mullis received the Nobel Prize in chemistry for his discovery in 1993.)
How does a PCR test work in the context of detecting the presence of a Covid infection?
First of all, this approach identifies the presence of the Covid virus directly (unlike the Rapid Antigen test we looked at earlier, which as the name implies, looks for the presence of antigens to the virus).
So back to the PCR test.
If you are a Covid virus expert, you might have noticed there is already a problem: If the PCR test is designed to detect a particular sample of DNA, how can it detect the presence of an RNA-based virus, such SARS-CoV-2, which causes Covid?
The answer is it can’t. We’ll first have to convert the RNA-based virus sample into a strand of DNA, using a process known as reverse transcription (or RT for short) to turn our RNA virus samples into strands of DNA.
(NOTE: you may have heard the PCR test for Covid referred to as an RT-PCR test, this refers to the back-to-back processes, e.g. reverse transcription followed by PCR.)
So how does it all work?
We’ll describe the steps in the manner of a recipe, which isn’t too far from the reality of the situation – after all, much of cooking is chemistry!
· Sample Acquisition
The first step is similar to the Rapid Antigen test – we need a nasal sample taken from the far back passages of the nasal cavity (nasopharynx), typically using a very long cotton swab. The sample is transferred into a sterile tube filled with a liquid (the viral transport medium) that will maintain the sample until it can be processed in the lab.
· Wash and Isolate the RNA from the Sample
The next step is to isolate and purify the Covid RNA sample (if present) by removing the other compounds (such as proteins) found in the sample. To accomplish this, the sample is put in a microcentrifuge tube, and a denaturing lysis buffer solution (typically phenol and guanidine isothiocyanate) is added to break up the cells along with RNase inhibitors, which help keep the long RNA strands of the virus intact. After pulse-vortexing in the microcentrifuge tube and incubating the solution at room temperature, the cells containing the virus will be broken up (i.e. lysed). The remaining viral RNA (if present) is then purified through a solid phase extraction method by placing it in a spin column inside a large centrifuge, where it will bind to a silica matrix membrane in the tube – allowing unwanted proteins and contaminants to be flushed away. The viral RNA is processed with a wash buffer to clean it again and is then processed in the centrifuge one final time using an elution buffer to remove the pure RNA from the silica matrix.
· Reverse Transcriptase: Convert RNA into DNA
As we said at the outset, PCR testing works with DNA, not RNA. So to conduct our PCR test, we must create a DNA “version” of our Covid RNA virus using reverse transcription. To make this happen, we need several chemicals on hand: a buffer, a Reverse Transcriptase enzyme, nucleotides (dNTPs), Reverse Primer and Forward Primer, a TaqMan Probe, and Taq DNA polymerase. (To simplify the procedure, many labs purchase different “master mix” sets of chemicals that combine these into a ready-to-use liquid solution.)
(Note: Taq polymerase is a special type of DNA polymerase that is heat-resistant, allowing it to work at high temperatures during the PCR process. They were derived from special bacteria, called Thermus aquaticus, found in extreme thermal environments (such as hot springs in Yellowstone National Park) hence the name Taq.)
To start the reverse transcription process, we add a Forward Primer to our viral RNA sample to identify the start of the section that we want to “copy,” then use Reverse Transcriptase enzyme to make the actual “complementary DNA” copy (known as cDNA for short).
NOTE: PCR tests at present only handle shorter sections of DNA at a time, so we don’t want to copy with ALL the viral RNA, just a short characteristic section that makes it easy to identify if it’s the Covid virus or not. For the Covid virus, we typically look at the RdRP gene in ORF1ab as well as the E Gene and the N gene to make a positive identification.
At this stage, we also add a special fluorophore marker, known as a TaqMan probe. As we’ll see in the next step, this will fluoresce or “light up,” making the presence of the DNA detectable by a sensor in our PCR machine once the DNA is duplicated in sufficiently large concentrations.
· Duplicate (Amplify) DNA and Look for Luminescent Marker Signal
Now that we’ve successfully created a cDNA copy of the section of interest in our viral RNA, it’s time to duplicate (or “amplify”) our sample to build up a high-enough concentration of DNA copies to be detectable.
To amplify the DNA, we’ll run the PCR process “cycle” multiple times. The first cycle creates two copies, the second cycle creates four, the third cycle creates eight, and so on. If our original sample included Covid virus genes, we’ll eventually create a high enough DNA concentration to be able to detect the fluorescence of the TaqMan probe, indicating a positive Covid test.
To prepare our sample for duplication, we add the master mix to our cDNA sample and transfer it to a well in a test plate. (Typically, our sample will be tested along with 95 other samples in a 96-well plate.)
Each PCR cycle involves three main steps: 1) denaturation, 2) annealing, and 3) DNA synthesis. This is typically managed automatically in a modern continuous PCR machine.
We will briefly explain each step.
- Denaturation
The 96-well plate is transferred to a PCR machine, where it will be heated to very high temperatures to induce the double-stranded DNA to separate (i.e., “denature”), exposing the individual strands of DNA. - Annealing
The temperature is cooled to allow the chemicals in the master mix to bind to the exposed single-stranded DNA for duplication. Specifically, the forward primer will bind to a single DNA strand, and the reverse primer will bind to the other single DNA strand. - DNA synthesis
DNA polymerase will bind to where the primer bound the single DNA strand and will start elongating a new strand, allowing the single DNA strand to become double-stranded again. The same process occurs on the other single DNA strand. The result is two new double-stranded DNA strands in the sample well.
Repeat the PCR Cycle to Amplify the Concentration of DNA Copies
To increase the concentrations of DNA further, we simply repeat the PCR cycle, again and again, each time heating the DNA strands, so they separate, allowing the primers and enzymes to do their work of creating new duplicate strands of DNA, and letting the solution cool down before starting the cycle again.
This process, known as DNA amplification, eventually creates a high enough concentration of DNA in the solution to be detectable.
But how do we detect whether the DNA sample is positive for the Covid virus?
Remember the TaqMan probe we added in the previous step? PCR machines designed for this kind of automated testing (known as qPCR machines, the “q” stands for quantitative) have built-in sensors to automatically detect the fluorescence of the TaqMan probe, allowing us to confirm the presence of the Covid virus (or not) as well as to infer the concentration of any Covid viral particles in the sample.
Field Lab Tests Help Control Drinking and Driving
Before the Covid pandemic, experts would often point out that flying was statistically much safer than driving. (Has the virus changed this calculation? It’s a matter of debate among experts.)
Nevertheless, driving is also part of our holiday travel, and impaired drivers are a significant risk – even if we’re just driving from home to the airport. (According to NHTSA, there were over 10,000 fatalities from drunk-driving crashes in 2019.)
What can be done from a lab testing point of view to reduce the number of drunk drivers on the road?
Currently, we rely heavily on law enforcement to identify impaired drivers and pull them over to administer field sobriety tests, typically a hand-held breathalyzer.
The technology is not new (it dates back to the 1920s), and the first roadside breath-testing device appeared in 1931. A suspected impaired driver blew into a balloon to collect an air sample, which was then passed through an acidified potassium permanganate solution, which changed color in the presence of alcohol.
Current generation breathalyzers date back to the 1980s, using a fuel cell alcohol sensor to detect the presence of alcohol. You can think of this as an open battery circuit, with an anode and cathode plate separated by an air gap; the driver’s breath sample is introduced into the air gap and, depending on the presence and concentration of alcohol, will complete the circuit (to a greater or lesser degree), providing an instant calibrated readout from which we can infer the drivers’ blood alcohol concentration.
Convicted drunk drivers may be required to install a breathalyzer in their vehicles. To start the car, they must first blow into a tube to “pass” a blood alcohol concentration test before the car’s ignition will allow the car to run.
However, this approach is limited to those drivers who have been pulled over, convicted, and required to install an interlock device.
What about the other drivers on the road who continue to drive under the influence.
One little-noticed provision in the new $1 trillion infrastructure package signed into law this year is a requirement that new vehicles (starting as soon as 2026) would need to add monitoring systems to stop intoxicated drivers.
For a preview of how these systems would work, we can look to current vehicles from GM, BMW, and Nissan that use dash cameras pointed at the driver to track driver attentiveness (to make sure drivers are paying attention to the road and not relying entirely on the semi-automated driving assist systems).
These systems use facial recognition and motion detection systems to look for signs of distraction, or worse, drivers that appear to be falling asleep, or losing consciousness, or other signs of impairment.
If detected, the car will slow down, turn on the emergency flashers, and, in egregious cases, move the vehicle to the shoulder and park it automatically.
How Does Facial Recognition Work?
Law enforcement officials already use facial recognition to identify suspects in criminal cases that are recorded on video. And many of us already rely on facial recognition to unlock our top-of-the-line phones.
But how does it work?
The first step is face detection, e.g. determining whether a face exists in an image or not.
If you are unfamiliar with face detection technology, you might assume it uses some form of deep learning/machine learning, where computers would be shown millions of images and “learn” about faces.
But there’s a very clever shortcut, known as the Viola/Jones algorithm, that is much simpler and faster to implement than a full-blown machine learning process.
To begin, we need to capture a clear image of the face, which is then processed to be a grayscale image.
The Viola/Jones algorithm then starts to look for features in the image based on some simple rules, or “classifiers,” and then subtracts one rectangular area from the other to find the difference in brightness.
If you build up a large enough set of classifiers, you can eventually pick out features: for example, the rectangle encompassing the eyes will typically be darker than a rectangle representing the cheeks.
But while computers are fast, the process of calculating the difference in brightness between every possible set of rectangles is slow.
To speed up the processing, the Viola/Jones algorithm pre-calculates the image into what they call an “integral image,” which is the sum of the brightness values across the image, calculated pixel by pixel starting at the far upper left corner of the image.
The result is a form of a Lookup Table (LUT) that makes calculating the brightness difference between pairs of rectangles orders of magnitude faster.
This allows us to quickly run through all the possible pairs of rectangles, looking at each one to see if we can rule out features that are “not a face” according to our face classifier rules. As soon as we get a “not a face” result, we can eliminate that pair; otherwise, we keep testing more and more specific classification features, still trying to prove the image is not a face. If we run out of tests, we have to conclude the image “is a face.”
Now that we’ve identified a “face,” we need to match it with a known face in a database; for example, this could be your own image stored in your phone that’s referenced it decides whether to unlock your device or not. Or it could be a large database of known faces in a criminal registry.
This part of the process is formally known as facial recognition.
To automate this process, we do have to rely on machine learning, starting with methods to classify different facial characteristics associated with each face.
One approach is to compare known facial images with unknown ones and let the machine learning begin to identify which images are similar to the known ones.
Ideally, this training process requires thousands (if not millions or billions) of images.
So how could this possibly work with your phone when you’ve only taken a single “selfie” to identify yourself.
The answer is during the facial recognition process (e.g. which you first register your face); your face image is uploaded to the cloud and mathematically classified in comparison to possibly thousands or millions of other facial images.
When it’s time to unlock your phone, the new image is uploaded and compared to the original “master” image you first used to set up your phone credentials. If the new image is reasonably close, the phone will unlock, allowing you to gain access.
It’s important to note here that the system is unable to guarantee 100% that the image is you. But it has to be close enough (in the eyes of the system) to assume that it’s most likely you.
Can the system be hacked? Yes, there are cases where people have attempted to open phones with rubber masks that are sculpted to “look like” another person. These systems also have trouble distinguishing between twins. Also, people’s faces change over time, and the pose angle of the head, changed lighting conditions, and other anomalies can confuse the facial detection system.
So you might ask, is there a more foolproof system that could identify you with 100% certainty?
The answer is yes, iris scanning, which we’ll look at next.

Iris Scanning Biometrics Speeds Up Airport Security
As we noted in the last section, facial recognition is not 100% accurate (the same goes for fingerprinting), meaning someone else’s ID might pop up if you look at a billion different faces (or fingerprints).
This is a problem for identity systems at international airports where flight security teams and passport control officers want to make a rapid, accurate identification.
As a result, you might have noticed that new ID programs are popping up at US airports, including Clear, TSA PreCheck, and Global Entry, which use a combination of biometric scanners, including iris scanning and fingerprints. We’re behind in this regard, however, as the UK first implemented their Iris Recognition Immigration System (IRIS) in 2004. (It has since been decommissioned as a cost-saving measure in favor of a cheaper chip-based system.)
Why use the iris for identification?
The answer is it’s a unique identifier that works independent of race, eye color, age, lighting conditions, etc. Very importantly, the iris is also an epigenetic feature, meaning its unrelated to our DNA, thus the colorful patterns surrounding the pupils will always be different – even for otherwise identical twins.
How does iris scanning work?
First, a clear image of the eye needs to be captured by a camera (using today’s modern camera’s this can be done from a couple of meters away or more).
The iris camera uses a near-infrared sensor that captures an image just outside the visible light spectrum – this has the advantage of eliminating the typical specular (mirror) reflections from light sources, such as overhead lights, which would otherwise block a clear image of the iris.
Next, it’s time to perform some tricky image processing to isolate the iris from the rest of the image – for example, removing the upper and lower eyelid as well as the eyelash features.
The result is a roughly circular shape, with a hole cut out in the middle for the pupil, and cutouts for the eyelids and eyelashes (if present).
The image is then transformed into a non-dimensional X by Y rectangle for processing and encoding.
The idea is we need to use a reliable, repeatable approximation method to convert the incredibly intricate patterns found in the iris into a reasonably sized number that will give us a perfect match the next time we try to identify this particular iris.
If you are familiar with hashing strings of text or numbers to encode a password for storage on a database, the next steps are conceptually similar, except we map the image details onto individual 3D curves, known as “wavelets.”
Each wavelet can be then be represented by numbers, resulting in a unique description, not unlike a two-dimensional barcode.
Now that we’ve given a very brief overview of the way the image is encoded, how does the overall system function at a passport control station, for example?
For iris identification to work, we first need to “enroll” a user; this requires an official to validate the person’s ID and enter their biometric details, including making a photo of their iris, which will serve as the “master” iris scan.
After a person is enrolled, they will approach the iris scanner again (at an airport, for example) and have their photo taken. The system will then try to eliminate non-matches as fast as possible (similar to facial recognition) until only one match is made, which is the ID of the person.
Sophisticated Biometrics are now in Widespread Use, but Where Do We Draw the Line for Personal Privacy?
As you can see, technology has come a long way in making us safer.
But where will this end, particularly given the steady march of technological developments?
For example, next-generation phones may have built-in cameras that are turned on continuously – making them more convenient but also potentially more invasive of our privacy.
Some very important decisions need to be made.
For example, it’s theoretically possible for new firearms to be made with positive ID systems built-in, rendering them inactive when handled by the wrong person. Is this a good idea to pursue even if it’s proven to work in practice?
Indeed, how much surveillance is good, and when does it infringe on our civil rights?
As China has shown, technology can enable the state to track its citizens throughout the day, using cell phone sensors and street-mounted camera networks.
This is a question we need to address, and soon.
Meanwhile, we wish you safe travels during this holiday season and a very prosperous 2022.
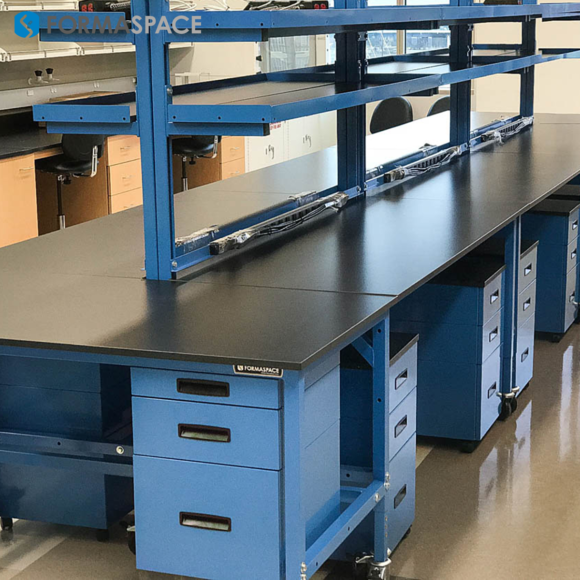
Formaspace is Your Laboratory Partner
If you can imagine it, we can build it, here at our factory headquarters in Austin, Texas.
Whether you are building a wet lab for biomedical research or an expanded IT center for AI/Machine Learning development, we can help.
Talk to your Formaspace Design Consultant today and find out how we can make your next project a success.

